So, following on from last week’s second layer I am adding focal images. By no means do I stick to just 2 layers …. it all depends on how the page develops … but for this series of videos I thought it would be easier to follow. I decided not to work on my inky butterfly background and do something else with that in future. That’s how it often is with art journaling; you can start a page with great intentions but things don’t work out so you have to have a rethink.
Focal Images with Simple Cut Out Shapes
A stallion to calm it down …This way provides a very bold result. On my page a black stallion stands out against a colourful background. I create him by tracing from a printed image by covering the back with white neocolour crayon. This effectively turns it into ‘carbon’ paper and is a very useful technique. I simply trace outlines but I could have added shading or even pattern inside the lines.
Negative Painting Around Focal Images
Removing background to show the flowersI really enjoy this technique as it means subverting the layering process to use the ‘background’ as the foreground. For my page I had already added the textural and glittery stencilling on the second layer and might have preferred to add it after this layer. Sometimes you just have to ‘go with it’. The white neocolour crayon is quite impressive in how much of the previous layer it is able to cover up.
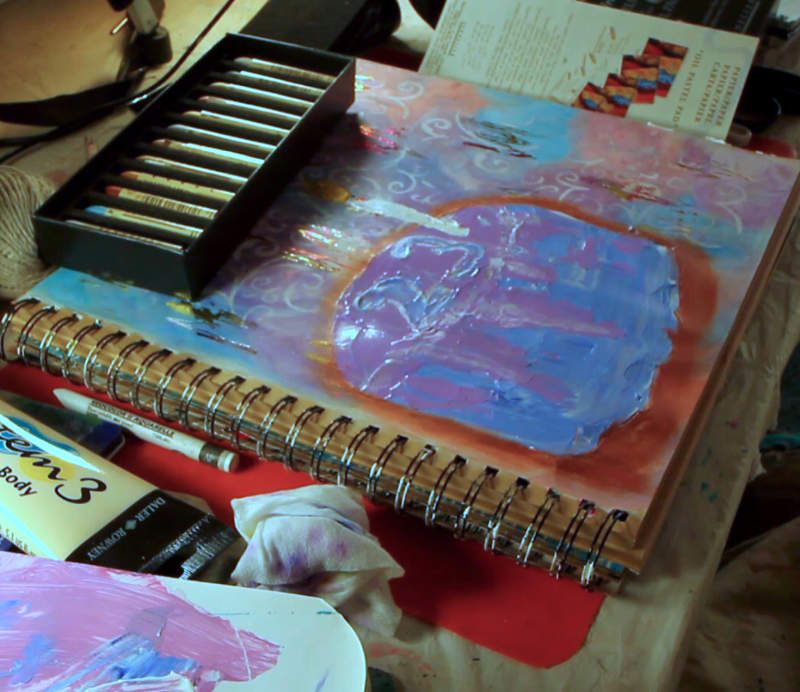
Impasto/textural Shape for a Focal Image
Using textureUsing impasto techniques (thick paint applied liberally) can really make your focal image ‘stand out’ from the background… Here I’ve added a dark oil pastel around the edges because my focal image and background colours were so similar.
Make Focal Images out of Collaged Pieces
Pretty collaged piecesCreating little collage pieces is easy when you use this technique. Draw your images on to the back of some deli paper then collage on the front and finally cut the shapes out. Just remember to reverse the images when you draw them on the deli paper.
I hope this has given you some new ideas to try in your own way. Hugs, Ceri xx
Sign Up for Art Journaling Updates
Related Posts:
Adding Layers in 5 Fun Ways in an Art Journal 25th July 2020 Adding layers is a great way to build up depth and interest on a page in your art journal. Last week I created 5 backgrounds…
Journaling in Your Art Journal 22nd August 2020 You can add even more layers of meaning by journaling in your art journal. As well as adding paint and imagery to a page it…
Top 5 Art Journaling Prompts to Use and Reuse 26th March 2019 When I first started art journaling I was always looking for ideas to inspire my art journal page spreads. I used poems, inspirational quotes, a…
Happy Process - What is Layering in Art? 23rd February 2020 In art layering means letting one application of paint dry before adding another. In some painting the layers are translucent, typically with watercolours but oils…
5 Background Techniques to Play with 19th July 2020 Background techniques are a great way to start an art journal page. On my art journaling courses people often tell me that they don't know…
Currently only dispatching to U.K. addresses. Sorry for the inconvenience. Ceri xx
Manage Cookie Consent
I use cookies on this site to find out basic things about visitor traffic, nothing personal. Some features of the site depend on cookies to work properly. In the future you May see adverts for this site on Google or Facebook.
Functional
Always active
The technical storage or access is strictly necessary for the legitimate purpose of enabling the use of a specific service explicitly requested by the subscriber or user, or for the sole purpose of carrying out the transmission of a communication over an electronic communications network.
Preferences
The technical storage or access is necessary for the legitimate purpose of storing preferences that are not requested by the subscriber or user.
Statistics
The technical storage or access that is used exclusively for statistical purposes.The technical storage or access that is used exclusively for anonymous statistical purposes. Without a subpoena, voluntary compliance on the part of your Internet Service Provider, or additional records from a third party, information stored or retrieved for this purpose alone cannot usually be used to identify you.
Marketing
The technical storage or access is required to create user profiles to send advertising, or to track the user on a website or across several websites for similar marketing purposes.


There are no comments yet ... go on, be the first!